


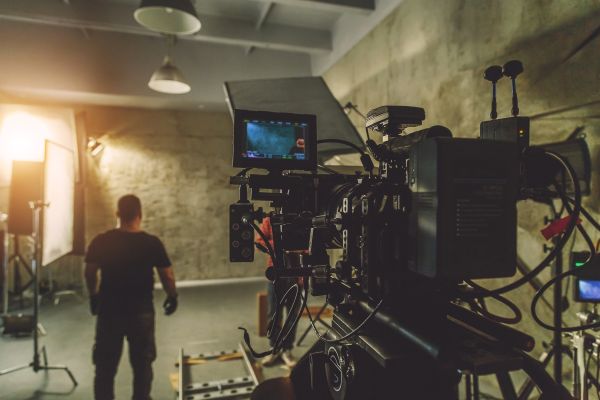
Film, as a visual medium, is dynamic, living, changing, and moving. One of the most tried-and-true methods of harnessing that movement in film is the camera dolly. Regardless of whether you’re shooting a commercial, music video, or a feature film, it can open up a range of movement that turns boring static shots into captivating visual storytelling.
One of the best places to make use of a camera dolly is in a studio environment. It offers filmmakers controlled lighting and sound, level surfaces, and room to move. With careful planning and thoughtful technique, even low-budget projects can rival big studio blockbusters. Here, we’ll take a look at why you’d use a camera dolly, best practices for incorporating it into your production, and how to put one to effective use in a studio environment.
To Dolly, or Not to Dolly
Before you decide to use a dolly on your next project, you need to understand why you’d want to use it in the first place. Camera movement should always buttress the emotional beats of a story. Movement for the sake of movement is distracting, but motivated motion pulls your audience into the narrative. A dolly can be used to:
Push in—move closer to the subject to create tension or intimacy
Pull out—move away from the subject to create scope, emotional distance, or reveal something
Track—follow a subject in parallel as they move, keeping the audience engaged in the motion and action of a scene
Dolly zoom—either dollying in on a subject while zooming the lens out or dollying out while zooming in, creating a distorting, suffocating, or anxious mood
360 Dolly—putting a subject in the center of a circular dolly track, then rotating the camera round them to capture a sense of epic scale
A dolly excels at creating seamless movement through a space, eliminating the shake of handheld cameras for something more cinematic and professional.
Plan Your Shots in Advance
A dolly shot is not something you can pull off impulsively. This is where creating a shot list in pre-production comes in.
Go through your script and identify what moments would benefit the most from a dolly shot. Once you’ve found your key emotional beats, you can begin to identify the individual setups you need and create a shot list. Some directors also find storyboards or simple stage diagrams helpful in communicating their vision to the DP and the rest of the crew when heavy movement is expected.
One other thing to keep in mind in planning out your shots is your time constraints. Complex dolly setups can add significant time to your day, so budget your studio hours wisely. You do not want to end up in a situation where you run out of time to get everything because you created too many dedicated setups.
Setting Up for the Perfect Take
As with many things in film, though, those few glorious minutes of shooting need to be preceded by an hour or two of setting up. Proper setup ensures not only a clean, smooth shot, but also safety for both your equipment and your crew.
Clear the floor: Clear any cables and sweep the area to ensure a clean working surface. Be on the lookout for any irregularities you may need to take into account.
Set out the track: Lay out your track as planned in your shot list. If any part of the floor isn’t perfectly level, use wedges to make sure the track runs along an even surface.
Mount the camera: Once your system is set up, you can mount the camera. Make sure the cart is correctly balanced! If it’s too top-heavy or uneven, the camera may tip while you shoot.
Safety on set is paramount, so dedicate some serious time to making sure everything is in good shape before rolling.
Coordinating with Talent and Crew
A dolly shot impacts lighting, blocking, performance, and lens focus, requiring communication and coordination between multiple departments on set.
Before you start shooting, rehearse the scene with both the talent and crew. Your actors need to know their blocking front to back, being able to consistently hit their marks as they move through the scene. At the same time, your camera crew needs to know when to dolly in, stop, pull out, and more as the actors perform.
It’s worth calling out lighting in particular. When movement is involved, your lighting circumstances can change throughout the scene. As part of planning and rehearsing your dolly shot, work with your crew to avoid any reflections or equipment that may come into frame. Also, ensure that your lighting stays consistent and that no odd shadows appear through the shot.
Take Advantage of the Studio Environment
A studio environment provides the ideal conditions for working with a camera dolly. Take, for example, Lightz Out Studios in San Diego. Since it is built for film, many of the variables that can make using a dolly challenging have been removed. They’ve also incorporated a number of other features to make your work easier.
With even, flat flooring, you can achieve smooth camera movement with minimal prep work. Many studios also come equipped with overhead grids, which can provide lighting throughout the day while also keeping your equipment out of the way of camera movement. They also offer a great deal of room, giving you the space you need to lay down a dolly track in addition to all your other equipment.
The greatest advantage of a studio, however, is consistency. With a controlled work environment, you can ensure you’re getting the same quality of light, the same movement, and the same shot as many times as you need it. With the ability to take your time, combined with an understanding of what a dolly brings to your production, you’re sure to get the perfect take.
